Official Freewing Twin 80mm/90mm A-10 Thunderbolt II Thread

Collapse
X
Collapse
First Prev Next Last
 
  • Time
  • Show
Clear All
new posts
  • janmb
    Slow and low

    • Jan 2018
    • 729
    • Send PM

    #7541
    Originally posted by crxmanpat
    Dave,

    No, it's the Castle Pro 20A UBEC:

    https://www.motionrc.com/collections...ns-20a-bec-pro
    They are brilliant. Very cheap insurance against power dips.. Which, especially on older spektrum receivers could be quite disasterous due to long reboot.
    Freewing A-10 turbine conversion: http://fb.me/FreewingA10TurbineConversion

    Comment

    • Pogo
      Getting old but still immature

      • Jan 2017
      • 452
      • Waterford, Ontario, Canada
      • Send PM

      #7542
      Originally posted by Dirty Dee
      Thanks for the pointer OV10! I thought I was going crazy with the loose fit, but your explanation makes sense now. this is my second FW bird with bad grub screw fitment, and the second time my allen keys have slipped and rounded it just enough to require an extractor tool. I'll try out the soldering iron trick before I use the extractor on this one.
      I got a lifetime supply of different sized grub screws from HK awhile back, as well as their Turnigy drivers, and the quality and fit is very good (and I'm not big on a lot of HK stuff). No more slipping allen wrenches! :Cool:
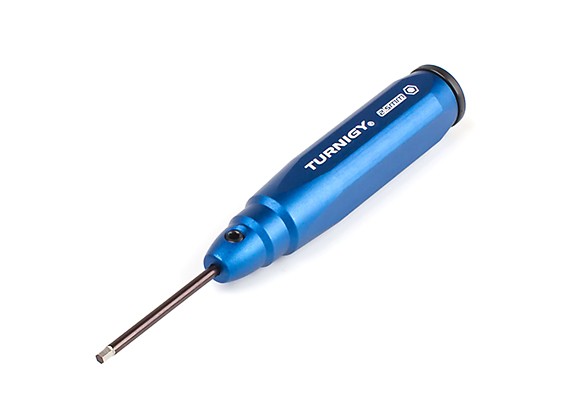
      The Turnigy V2 range of drivers: comfortable, high quality, precision tools at a price that can't be beaten.


      Tom

      Comment

      • Justwingit
        Hobby Squawk Student Pilot

        • Jan 2018
        • 46
        • Las Vegas, NV
        • Send PM

        #7543
        I know there's already been a video posted of this....

        BUT....this is EPIC!!!!

        FIVE Freewing A-10's FILL THE SKY over Mesa Arizona...WHOOT!!!


        Turn up the volume on this one....the sound of all those EDFs at once is AMAZING!

        Enjoy the SPECTACLE :Cool:!!!

        Comment

        • crxmanpat
          Certified Foam Abuser

          • Oct 2014
          • 2464
          • Crawfordville, FL
          • Send PM

          #7544
          Great vid John! It was fun doing that formation flight.
          Pat

          Comment

          • Shirty
            Hobby Squawk Water Boy

            • Jan 2016
            • 1067
            • Perth, Australia
            • Send PM

            #7545
            Originally posted by 1horse59
            Thanks also for the pic. So, just checking, but the scissors part goes forward then? This might be why my mate said he had to cut the triangle and door, think his might be backwards...?

            Comment

            • RCAV8R
              Certified Plane Nut

              • Apr 2017
              • 355
              • Medford, Oregon
              • Send PM

              #7546
              Originally posted by Pogo

              I got a lifetime supply of different sized grub screws from HK awhile back, as well as their Turnigy drivers, and the quality and fit is very good (and I'm not big on a lot of HK stuff). No more slipping allen wrenches! :Cool:
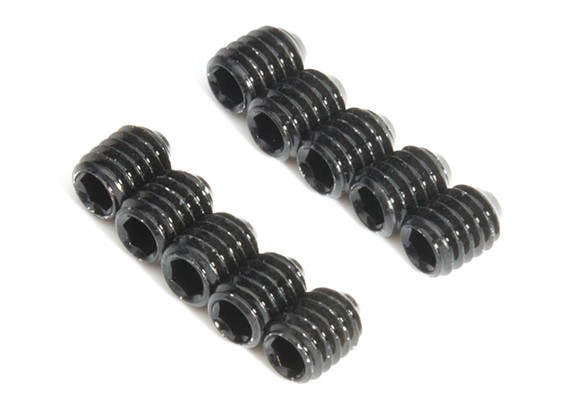
              https://hobbyking.com/en_us/turnigy-...mm-x-60mm.html
              https://hobbyking.com/en_us/metal-gr...10pcs-set.html
              Tom
              This is a great fix Tom...thanks! So M4 = 2.5mm? Rob

              Comment

              • janmb
                Slow and low

                • Jan 2018
                • 729
                • Send PM

                #7547
                Originally posted by RCAV8R

                This is a great fix Tom...thanks! So M4 = 2.5mm? Rob
                M4 only refers to the threads. Not sure there's any given correlation between threads and wrench size.
                Freewing A-10 turbine conversion: http://fb.me/FreewingA10TurbineConversion

                Comment

                • Pogo
                  Getting old but still immature

                  • Jan 2017
                  • 452
                  • Waterford, Ontario, Canada
                  • Send PM

                  #7548
                  Originally posted by RCAV8R

                  This is a great fix Tom...thanks! So M4 = 2.5mm? Rob
                  As Janmb says- not necessarily. I 'd just order a variety of sizes of grub screws and keys or drivers (if you need them) and you'll be set for any scenario down the road. Replacing the stock (cheese-like) grub screws that come in these (and many other) retracts makes things a whole lot easier.
                  Tom

                  Comment

                  • crxmanpat
                    Certified Foam Abuser

                    • Oct 2014
                    • 2464
                    • Crawfordville, FL
                    • Send PM

                    #7549
                    I have this small screwdriver bit set that I use all the time for my models. It comes with allen, torx, and star bits, as well as other normal bit types. I've found that if a grub screw starts to round out on the allen bit, one of the torx or star bits can get in there and work it loose. I love this kit, one of the best Christmas presents I ever got!

                    Pat

                    Comment

                    • OV10
                      >>>Twins are 2X the Fun<<< (Squawk Moderator)

                      • Sep 2014
                      • 4264
                      • Owego, NY
                      • Send PM

                      #7550
                      Originally posted by janmb

                      M4 only refers to the threads. Not sure there's any given correlation between threads and wrench size.
                      There is a correlation. There are international engineering standards in place such as ISO, DIN and ANSI that regulate dimensions and metal grades.
                      Without referencing numerous charts, I'll just list the wrench size used for the thread size of the set screw(what a lot of modelers call grub screws) commonly used in our hobby.
                      Be advised that socket flat/button/cap drives have different wrench size standards(they are a little larger) than set screws.

                      Screw / Wrench
                      3mm / 1.5mm
                      4mm / 2mm
                      5mm / 2.5mm
                      6mm / 3mm
                      8mm / 4mm
                      Warbird Charlie
                      HSD Skyraider FlightLine OV-10 FMS 1400: P-40B, P-51, F4U, F6F, T-28, P-40E, Pitts, 1700 F4U & F7F, FOX glider Freewing A-6, T-33, P-51 Dynam ME-262, Waco TF Giant P-47; ESM F7F-3 LX PBJ-1 EFL CZ T-28, C-150, 1500 P-51 & FW-190

                      Comment

                      • RCAV8R
                        Certified Plane Nut

                        • Apr 2017
                        • 355
                        • Medford, Oregon
                        • Send PM

                        #7551
                        Thanks guys! I've had a lot of strut changes with my FW Stinger 90 and in the process went through several stripped set screws...particularly the little one that fixes the pin to the retract. This helps and I will get after market screws to replace them all! Rob

                        Comment

                        • janmb
                          Slow and low

                          • Jan 2018
                          • 729
                          • Send PM

                          #7552
                          Originally posted by OV10

                          There is a correlation. There are international engineering standards in place such as ISO, DIN and ANSI that regulate dimensions and metal grades.
                          Without referencing numerous charts, I'll just list the wrench size used for the thread size of the set screw(what a lot of modelers call grub screws) commonly used in our hobby.
                          Be advised that socket flat/button/cap drives have different wrench size standards(they are a little larger) than set screws.

                          Screw / Wrench
                          3mm / 1.5mm
                          4mm / 2mm
                          5mm / 2.5mm
                          6mm / 3mm
                          8mm / 4mm
                          Awesome - good to know
                          Freewing A-10 turbine conversion: http://fb.me/FreewingA10TurbineConversion

                          Comment

                          • RCAV8R
                            Certified Plane Nut

                            • Apr 2017
                            • 355
                            • Medford, Oregon
                            • Send PM

                            #7553
                            So I just got back from my local hobby store...bought DuBro set screws and the guys sold me on a set of MIP Hex drivers. They are mostly car guys, but swore by these. They are on Horizon's site, and probably elsewhere.

                            https://www.horizonhobby.com/metric-...283%29-mip9502

                            I did some research...a lot of great reviews on these drivers!


                            Rob

                            Comment

                            • crxmanpat
                              Certified Foam Abuser

                              • Oct 2014
                              • 2464
                              • Crawfordville, FL
                              • Send PM

                              #7554
                              Glad I kept all the parts from my crashed A-10. Went to assemble the tail section on the replacement today and discovered that the factory had used the same two screw covers on the horizontal stab. There are actually two different styles of covers; one is shorter than the other. So I just popped the correct one off my crashed plane, popped the wrong one out of the new plane, and switched it out for the correct cover.

                              I'm down to hooking up the control surfaces, and waiting on some decals from Callie (I'm doing the same Davis-Monthan 357th Dragons as on the last one, but I'm going non-scale with nose art and using the one in the pic called Metal Dragon). All the nomenclature decals are on, all the weathering has been done, and she has a coat of clear Dullcote. I also swapped the stock nose gear out for the trailing link version, added the cooling vent (F-5 cheater grate), opened up the refueling port to allow air in, and put the rear antennas in the scale location. I should get her in the air next weekend.

                              By the way, anyone wanting to take out the stock UBEC and add a Castle CC20 Pro, DO NOT solder it up prior to running the wiring through the plane. The CC20 will not fit through. Don't ask me how I know. :Silly:
                              Pat

                              Comment

                              • Shirty
                                Hobby Squawk Water Boy

                                • Jan 2016
                                • 1067
                                • Perth, Australia
                                • Send PM

                                #7555
                                Cool pat, could you post a pic of the nose gear install please mate? Thanks.

                                Comment

                                • crxmanpat
                                  Certified Foam Abuser

                                  • Oct 2014
                                  • 2464
                                  • Crawfordville, FL
                                  • Send PM

                                  #7556
                                  The trailing link nose gear install is very straightforward. Take the retract unit out, loosen the two grub screws in the strut, remove the old strut, install the new strut and tighten the grub screws. Install the unit back in and you're done! Others had talked about cutting the door or removing the white plastic door guide, but I got a lot of flights in on my first plane after installing the new TL nose gear and saw no issues.

                                  I also added a shot of how I placed the rear antennas to look more scale.
                                  Pat

                                  Comment

                                  • Shirty
                                    Hobby Squawk Water Boy

                                    • Jan 2016
                                    • 1067
                                    • Perth, Australia
                                    • Send PM

                                    #7557
                                    Thanks heaps mate. That's awesome cheers.

                                    Comment

                                    • Helmsman52
                                      Member

                                      • Jan 2017
                                      • 247
                                      • Saint Paul, MN
                                      • Send PM

                                      #7558
                                      Click image for larger version

Name:	26BD4A98-3F43-4FDB-BA5A-E006FE299A3A.jpeg
Views:	571
Size:	165.3 KB
ID:	119919 Free decals. Just pay for postage.

                                      Comment

                                      • dkalwishky
                                        Warbird Lover

                                        • Sep 2015
                                        • 1382
                                        • Des Moines, IA
                                        • Send PM

                                        #7559
                                        If no one else has asked, I'd take them. I'll send you a PM.

                                        Comment

                                        • crxmanpat
                                          Certified Foam Abuser

                                          • Oct 2014
                                          • 2464
                                          • Crawfordville, FL
                                          • Send PM

                                          #7560
                                          One thing I noticed on my new one is that all decals are now water slide. No more peel and stick transfers.
                                          Pat

                                          Comment

                                          Working...