


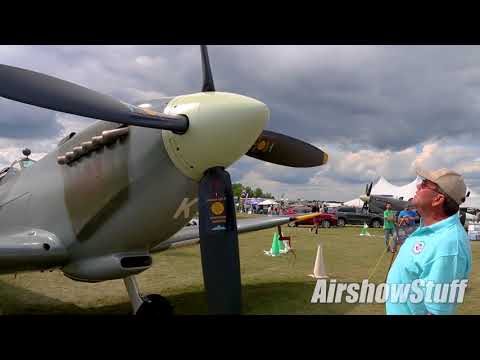
Atzfatz, Great pic, sans the hat and that could easily be an air-to-air publication photo. Well done and Welcome to Hobby Squawk! Best, Elbee
-
"I am having an extraordinary ordinary life."~Lucky B*st*rd~
"Find satisfaction in the process rather than an outcome."~Anonymous~
AMA#116446 -
Hey Guys...So I got my Spitfire put together over the weekend and I had a couple questions for you all!
1) The wiring seems awfully tight. I don't like using extensions, but in this case I'm tempted to add to the LG, flaps and aileron leads just to make it easier to connect to my RX. I will keep the wing together as one, and don't have to deal with the control box, but what do you recommend to make the assembly easier going into the RX?
2) My port flap is not getting the same deflection as the starboard by about 5mm. I can hear the flaps creaking and suspect there is some imperfection in the joined sections not getting the full amount of torque throughout, but I wondered if you might have noticed it, or if it could be a bad servo?
Thanks in advance for your help! I'm looking forward to the maiden! RobComment
-
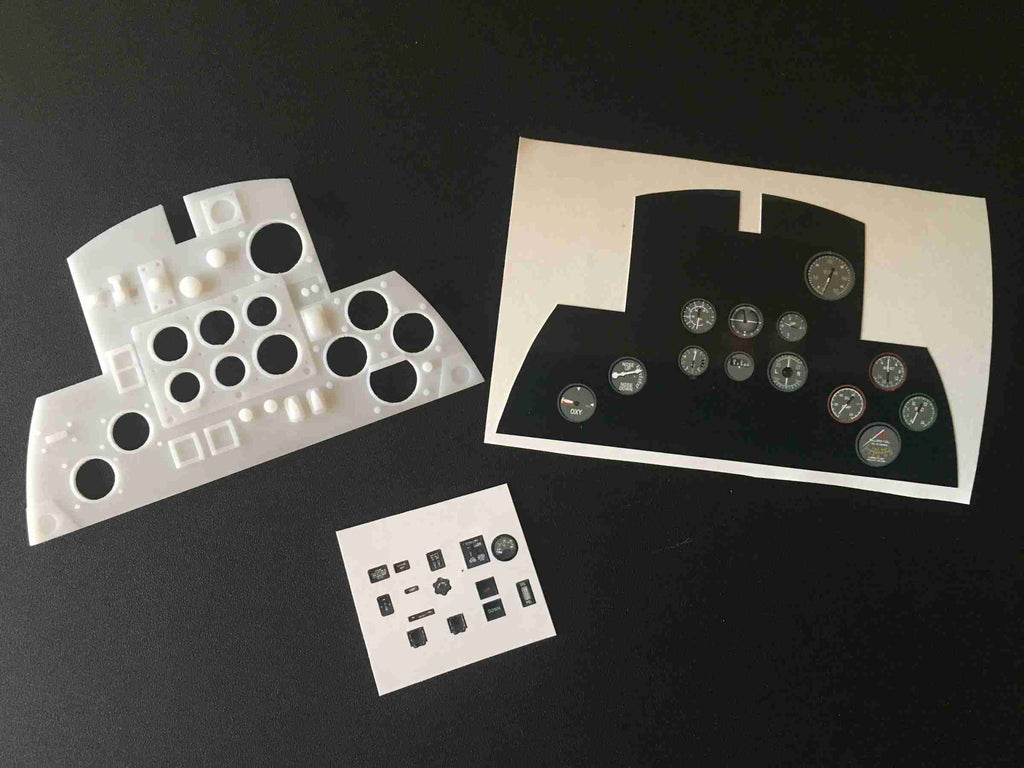
Hey Y'all, The 3DP Spitfire cockpit parts I received from MotionRC are great, however, the 'formers' and the 'instrument panel' were a bit warped. I simply ran hot water (130F) over these, pressed these flat on the kitchen counter and allowed these to cool. Perfectly flat now. Uncertain whether a 3DP part has a 'memory' like many other formed parts, but I had to press the parts flat. Also, whether these parts are now annealed I don't know. Also, I do not know the filament from which these parts are printed, my guess is PLA as the finish is great but Plastruct Cement doesn't seem to 'weld' the parts like it does ABS. I am concerned, as well, whether the parts will warp again when the heat in the cockpit reaches 100+F. Any comments are welcome. Best, LB"I am having an extraordinary ordinary life."~Lucky B*st*rd~
"Find satisfaction in the process rather than an outcome."~Anonymous~
AMA#116446Comment
-
I regards flap deflection I went in and did a little sanding and scraping around inside of hinges and stuff with Exacto to make sure I had easy movement all the way around. With my Spektrum radio I had to adjust travel electronically as the two flap servo's didn't match exactly and I didn't want to dig them out of the wing. Also, I think adjusted the flaps down just a scosh, tad, smidgeon or whatever as they would bind the servo's a little bit to snug them perfectly flush in the up position. This was due to the flaps and trailing edge not being perfectly shaped to each other but it's not really noticeable.Originally posted by RCAV8R View PostComment
-
I found the same thing and ran three extensions up to the receiver from the blue box, that way I can easily assemble/disassemble the plane. Easier to test servos when everything is hooked up as well.Originally posted by RCAV8R View Post
Grossman56Team Gross!Comment
-
Here's my Spitfire ready to go. The squadron markings are from Callie, who provided an excellent service, as always!
The model represents MH434 belonging to The Old Flying Machine Company based at Duxford and as flown by the late, great Ray Hannah.
Being a restored and cherished Spitfire, MH434 shows very few signs of wear and tear, thus saving the job of weathering while still representing an authentic 1943 Spitfire Mk ix
Construction, as expected from Flightline is effortless, with everything fitting perfectly. MrRC Sound Aspire currently being fitted.Comment
-
Hi Meadowhay , your markings are my favorite, I have similar on the FMS 1.4 Spitfire (discontinue), and when the ,the Flightline 1600 Spit arrives,I'll set up the same tags.Comment
-
MD, Looks great! Really like the MRC cockpit kit and Aces of Iron pilot. Adding those items to mine as well. Bravo Zulu. Best, ElbeeOriginally posted by meadowhay View Post"I am having an extraordinary ordinary life."~Lucky B*st*rd~
"Find satisfaction in the process rather than an outcome."~Anonymous~
AMA#116446Comment
-
My 1600mm Flightline Spitfire has met it's demise.
It was a really nice night to fly with virtually no wind, very low humidity and temps in the mid 70's. You couldn't ask for better weather. I was doing some really nice wheel landings, everything was perfect.
One of the guys at the field commented that it looked like a nice flying plane to which I said "it flew so well that if I were to wreck it I'd order a replacement immediately."
I had already put three flights on the plane but during the take off roll on the fourth flight I had an accident that did enough damage to the plane that I will be ordering a replacement once MotionRC get's them back in stock which they said would be 2 - 4 weeks.
You'll see in the attached picture (the yellow line if the path the plane took) that during the takeoff roll I was not quick enough to compensate with right rudder so I was veering toward the grass, I got the plane straightened out but let off the rudder a bit too much and she headed for the grass again. The left gear caught the grass, the plane popped up into the air a foot or two and spun around 180 degrees and pancaked back onto the ground.
I had been wanting to replace the wings since they had damaged in a prior mishap, I'm glad I hadn't done that as they would need replacing again.
The damage was extensive but that may be hard to see in the pictures. The crash was violent enough that the wiring you see in the fourth picture was tossed forward about 4 inches from where it was along with the receiver. The wings need replaced, both retracts are shot, the engine is ruined (might be fixable as the shaft is bent), the fuselage has a crack in it that could probably be repaired but this is one of my top 5 favorite planes so I want it looking better than this and the spinner and prop blades are shot. These parts come to within $70 of a new plane so I'm getting a new plane!Comment
-
:(:( Sorry that happened. The next one will be better!! :Cool:
Comment
-
I realize that it maybe a straightforward assembly, but a "how to video" would be great for this 3Dpup cockpit set...Originally posted by meadowhay View PostComment
-
dblmars, I do understand your inquiry. I have noodled it and in terms of what is to be removed from the airframe is basically nothing. The side panels are rounded on one corner which goes aft. Of the two formers; the small one glues (I'm using Foam-Tac) to the rear of the molded cockpit space. The larger one sits at the 'breakpoint' of the canopy where in full scale the 'turtledeck' begins with the voltage regulators facing aft. The OEM horizontal support (wood) then goes from it's OEM position on the aft former and sits on top of the voltage regulators as it has no other place to go. One note, the seat is adjustable then, so ask your pilot for a preference...LOL. I am certain I am not telling you anything you've not figured out yourself. The design is good, but not great. The amour plate is pinned to the large former and goes forward toward the seat. Given the inclination this winter, I will use MRC 3DP files and improve upon it and try printing something better with more details for a future model. I will post the files when completed. I could supply pictures when I install it, though that will be in another couple of weeks while I modify the Spittie and after a repaint. Best, LBOriginally posted by dblmars View Post
"I am having an extraordinary ordinary life."~Lucky B*st*rd~
"Find satisfaction in the process rather than an outcome."~Anonymous~
AMA#116446Comment
-
Warbird Lover, so sorry to hear about your mishap. I have some of the same issues that caused your plane's demise; on my Spitfire, 1700mm P-51 and Corsair. Installed the AR636 with gyro in all three, then programmed the receiver with 80-90% heading hold on both rudder and elevator for my Flight mode 2 with take-off flaps. Now, the heading hold catches the left turn quicker than I can on take-off and allows me to "catch" up with right rudder before it get's too far off line. I never use take-off flaps, so it was a little tricky programming the receiver for flaps up (normal fly around) with only rate gains, 10% flaps for take-off with 90% heading hold, and then full landing flaps with only rate gain. None of the techs at Spektrum could figure out how to still get 3 flight modes with vary little travel between flaps up and take-off flaps (only 10%), but after a lot of trial and error, I figured out the flight mode actuation level for each mode with the flaps. All three planes now track "relatively" straight on take-off and with the elevator heading hold, it keeps the tail down longer and gives a very smooth lift off when the plane reaches flying speed. I guess it's cheating a bit like this, but if I could now just figure out an auto-pilot landing, I'd be in 7th heaven. If you decide to put an AR636 in, I can give you all the rate gains and heading gains I use along with how to set the flaps up to actuate the different flight modes. I use the DX6, so I needed to piggy back the flight modes (with various different gains) on the flap channel, but if you have a DX8 or higher, I think you can set the Flight Mode channel to Aux2 and not have to program the work around.Originally posted by dkalwishky View Post
Had the same mishap early on in the Spitfire's life before installing the AR636 and ended up cracking the fuselage in half just behind the wing root. Epoxied it back together and added carbon fiber tubes for reinforcement (which for some reason were missing in mine) and since then have gotten another 40 flights out of her and she's still holding up. You can see from the pictures that you can't even see where the fuselage cracked.Hugh "Wildman" Wiedman
Hangar: EDF's: Mig 29 TV "Cobra", A-10 Arctic, SU-27 90mm 8S:F22 Red Lion/EuroFighterBronzeTiger/F18 Canadian & Tiger Meet/F16/F4 Jolly Rodgers & Blue Angel, 80&90 TV Avanti, Viper, Stinger 90. Props: 1600 Corsair & Spitfire, B-24, 1700 P-51, 60" Beast & P2 Bipe, Extreme Flight-FW-190 Red Tulip, Slick 60, 62" Extra 300, 62" MXS Heavy Metal, 62" EdgeComment
-
Thanks LB,
I only wrote my post because there was neither installation instructions provided anywhere, and the absence of any graphics... I just thought there should be a throttle quadrant and the undercarriage controls on either side of the cockpit. Since the stock pilot bust appears to be a bit undersized; I am replacing it with a somewhat more scale Raf half pilot with arms so having a throttle controls and a control "stick" becomes relevant to be included in my cockpit(s). Please promote Callie Graphics, as she now has the a graphics decal set for 1600mm Spitfire cockpit instrument panel which is spot-on!Comment
-
dblmars, here are a few more pictures. The Callie Graphics instruments are used in this build. When I dry-fit the 3DP parts the assembly seemed to go easiest in this order: 1) Instrument Panel, 2)Side Panels, 3) Aft Former, 4)Armor Plated Former, 5) Seat. The top of the side panels are NOT flush to the bottom molded upper cockpit, i.e., these just don't tuck up under the side reinforcement like I thought. I cut off the 2 tabs on either panel as well. Again, good parts, not great parts. As far as 'throttle and flight control stick' it seems those will need to be scratch built. The cockpit is a bit shallow for much other detail. I agree a new pilot with arms/hands is a good addition. I chose the Aces of Iron 1/7th WWII American Pilot and will modify it a bit for RAF. Best, LBOriginally posted by dblmars View Post"I am having an extraordinary ordinary life."~Lucky B*st*rd~
"Find satisfaction in the process rather than an outcome."~Anonymous~
AMA#116446Comment
-
Skipper's repair job is almost finished! Yeah, I know I said Winter project, but couldn't resist...….
She dug in the port side wing tip and landed on a sage brush, the fuselage came apart at the joint and the retracts ripped out. I was taking off and the port wing dropped and I just couldn't get it corrected. I've since added a platform in the battery bay for an A3L gyro, epoxied the two fuse pieces together, repaired and re-glued every loose piece on both wing tips, mixed up some green paint and played with it until it matched the original color to almost perfection, resprayed it on and repainted the flat Minwax as well. Tip: If you mix your own colors and get a great match, get a piece of cardboard and paint a swatch on it big enough to take to Ace to be able to scan it and have a sample can mixed, beats the heck out of trying to remix a color over and over again.
Here she is re-mated to the fuse, no screws or spinner, just a trial fit. I'm waiting for the retracts to get back in stock, then I want to get the 3D cockpit as well as a new blue box. Can't say for sure where the trouble was on the take off, but I don't want to leave anything to chance, the Blue box didn't travel well on the return trip from Muncie, so…...My hunch is that I didn't have enough speed when she left the ground, the motor seems to be strong enough to pull the airplane into the air before the wings have developed enough lift, does that make sense??
All I know is that after she was down, I looked at my hands to see where the control input was and I had her hard over to the right, but she just wouldn't lift that wing.
Grossman56Team Gross!Comment
-
Your repairs look great! Just like the real machines, our birds always end up with repairs and that’s the way it is when you fly them.
I have read up a fair amount on Spitfires over the years. It is a tricky airframe at slow speed and especially with an aft cg. NACA testing in 1943 on a Mk V was much less than complimentary about this fact. The large wing fillet causes turbulence over the empennage and lateral stability suffers but this is normally only experienced during landings. Another issue came about thanks to British Air Ministry’s need for a high altitude engine. The Merlin’s supercharger was redesigned and not only were higher altitudes achieved, a general 25% increase in power was attained. The Mk IX used the standard dimension rudder with this extra horsepower so more rudder input was necessary to overcome the added torque from the now four bladed engine. The Mk VIII airframe was redesigned and it incorporated the 25% larger pointed rudder to counter this extra torque.
I have two Spitfires. My Mk VIII with modified rudder is done as Bobby Gibbes hack and my Mk IX is in Bob Tuck’s livery. Having flown both many times, I prefer the larger rudder on the 8 than the smalller one on the 9. I always feel like I have better longitudinal control of the 8. The four blade prop with the snappy electric motor on 6s can really get hold of the model during takeoff or transitions and very quickly yank it hard left, especially if there’s any crosswind to the left. Only rudder will compensate for this torque..., ailerons are useless.
Go easy on the throttle and manage that without too quick a movement, slow and steady on the takeoff run so as not to instantly create an overtorque condition beyond what the rudder can compensate for.
The bigger rudder definitely helps overcome the large amount of torque encountered at slower operating speeds. If you look up in flight pictures of Grey Nurse Spitfires make note of the position on the rudder, always countering that torque.Comment
-
Good advice OT, It was strange because I haven't had a problem taking off, possibly from previously flying something like the Bearcat and hopping over to the Spitty, didn't stop to reorient myself. At any rate, I know what you mean about the rudder. My landings have definitely improved since getting on the rudder as soon as the mains are down on the runway. You just know she's going to turn left so get the correction in. I was actually enjoying landing her, once it becomes the game, the challenge is there which is great motivation.
Grossman56Team Gross!Comment


Comment