


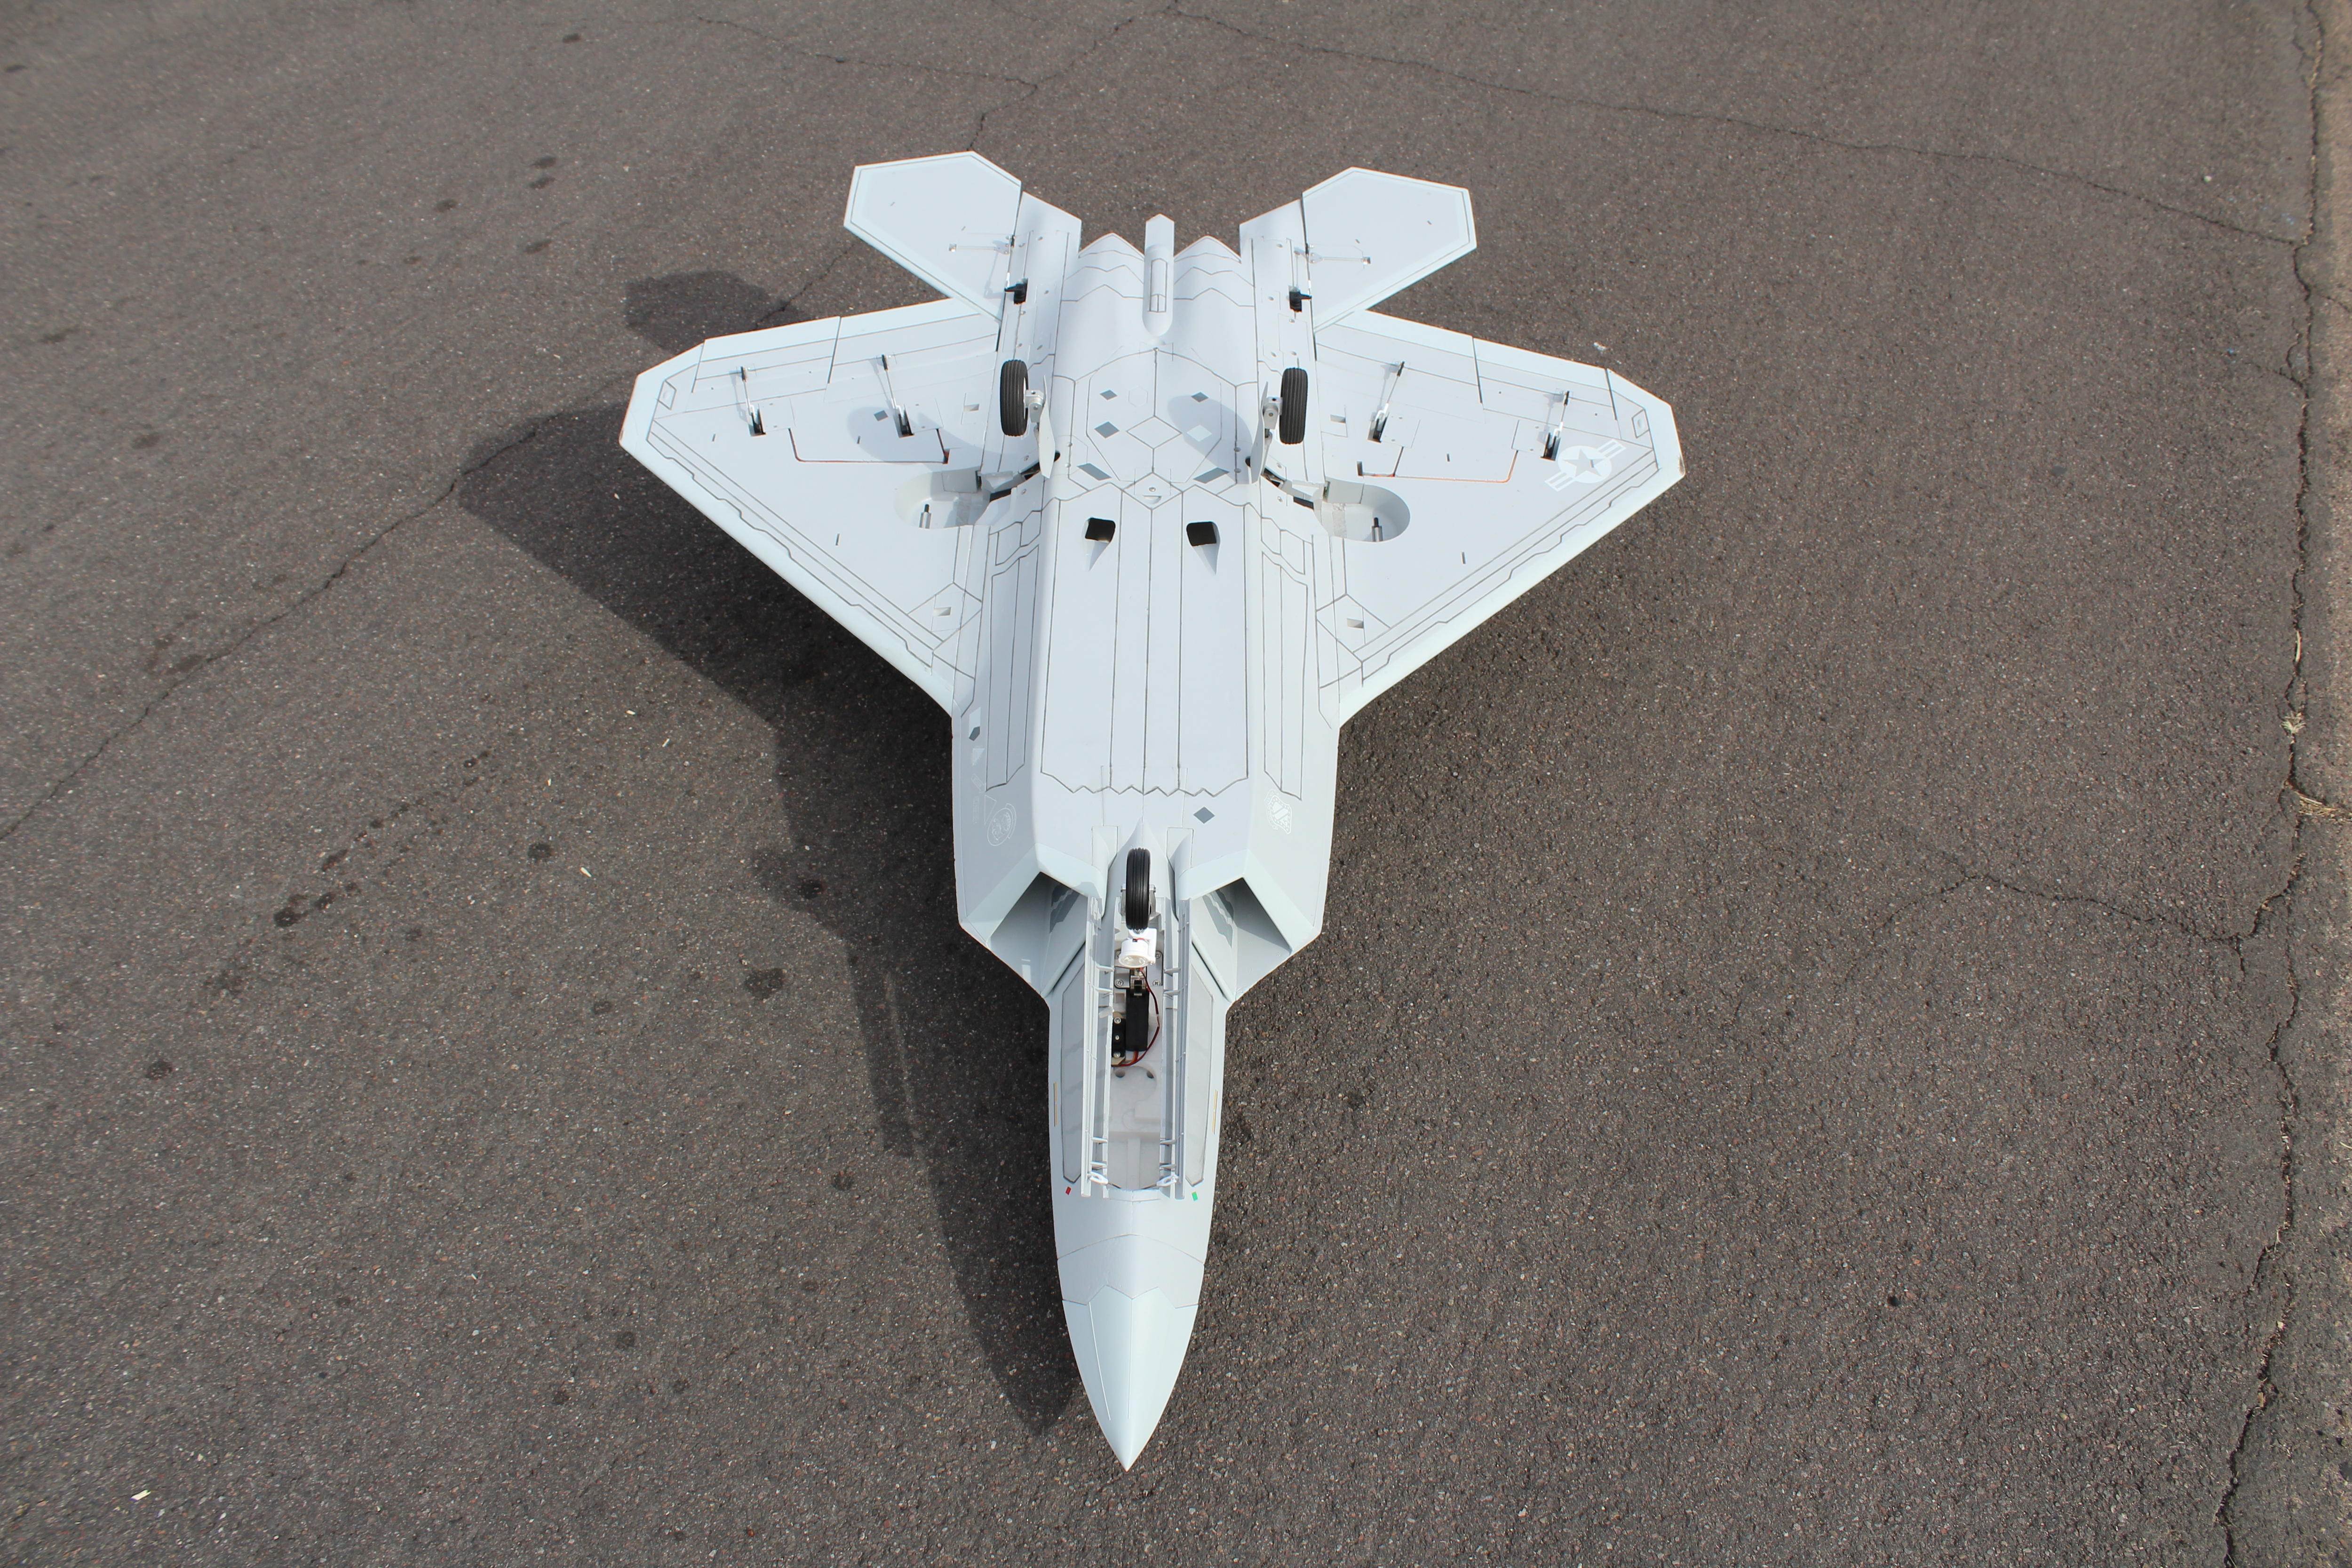
Well on my 7th flight I had an issue. I was at full throttle about to lift off when my front wheel came off. The set screw was still there but obviously loose. I am flying off dirt which is a central California loose sandy mix and the nose plowed into the ground till it stopped. I thought the front end was ruined and prepared myself for the worst. The wheel and shaft was intact, along with the plastic flex arm piece that clips to the landing gear. The strut, land gear servo, and gear doors were fine, just dirty. The flex arm piece attached to the strut was pushed back into the foam aft of the gear, which is the only real damage. I’ll need to check out my fan blades but I re-assembled it all and put it back up in the air. I’m thankful the plane didn’t lift off with a dangling nose wheel as it probably would have done more damage landing it than plowing to a stop on take off. So check your set screws. I’ve had other Freewing landing gear set screws come loose so I’m going to locktite the rest.
Just a heads up.


Comment